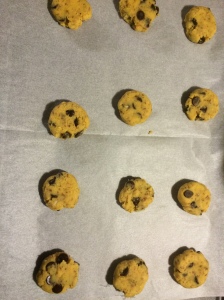
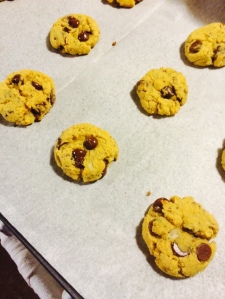
Coconut Chocolate Chip Cookies

I have been wanting to buy coconut flour for a while to try it out and see how it holds up in baking.  It’s not a 1 to 1 conversion to all purpose flour so it’s mostly mixed with other flours and needs an equal amount of liquid when baking with it.  In this recipe its not mixed with a more stable flour leaving this cookie really moist and delicate.  Its so good, its hard not to eat them all, but these are guilt-free so you CAN eat them all but its nice to share!

Coconut Chocolate chip cookies (grain free)
1/3 cup coconut flour
3 TBS flaxmeal (ground flaxseeds)
1/4 cup coconut oil
1/4  pure maple syrup
1 teaspoon vanilla
1/2 teaspoon of baking soda
1/4 teaspoon salt
2 eggs
1/3 dark chocolate chips (mini or regular)

1. Preheat oven to 350
2. Mix first 6 ingredients in a bowl with a rubber spatula until well incorporated.
3. Add the chips.
4. Use a Tablespoon to measure out the cookies and place on a prepared baking sheet lined with parchment.  (I spray a little coconut baking spray but you don’t have to!) Use your finger to flatten out the cookie a bit.
5. Bake for 12-14 minutes.  My trick.. I add more chips on top of cookies right when they come out, great visual affect and doesn’t hurt to add more chocolate!
This is very moist cake like cookie, I used Bob’s Red Mill Coconut flour and Flaxmeal!

Photo Jan 22, 8 30 50 PM Photo Jan 22, 8 40 34 PMPhoto Jan 22, 10 40 17 PM Photo Jan 22, 10 40 17 PM Photo Jan 22, 9 17 11 PM Photo Jan 22, 9 00 38 PM

Breakfast Smoothie- Blackberry-Mango Banana Almond

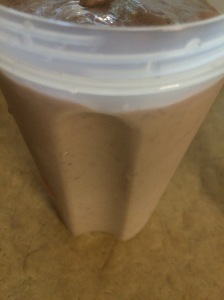
Here is my trick for making smoothies, the night before I gather the fruit in a plastic bag and place in the freezer overnight.  This way I don’t have to deal with watering down my smoothie with ice.  Sometimes I forget and do add ice, but the taste with all fruit is just way better. Last night I cut up a banana and placed in the freezer along with a few blackberries.  I had purchased frozen mango as well.  This morning I blended together the banana, mangos and blackberries along with homemade almond butter and almond milk. Refreshing, not overly sweet and nutty.  Who needs coffee when you can have this for breakfast?

Blackberry-Mango Banana Almond Smoothie

1 frozen banana

1/2 cup frozen mango

5 blackberries

3 TBS almond butter

11/2 cups almond milk

1. In a blender combine frozen fruit, almond butter and milk.  Blend until smooth.  Its thick but not super thick, I added a little more milk but that’s just my preference. Play around with it and enjoy!

Photo Jan 21, 8 52 09 AM Photo Jan 21, 8 52 06 AM Photo Jan 21, 9 17 58 AM Photo Jan 21, 9 18 06 AM

Puréed Cauliflower

Cauliflower is the new kale.  You type cauliflower into a Pinterest search and you get anything from buffalo cauliflower bites to cauliflower pizza crust.  I’m glad because I feel like I have ignored it for years.   For one, it smells when it’s raw and I thought it was just boring.  I have tried the pizza crust (and have perfected it!) and the Asian flavored bites are a great appetizer.  I made this Puréed  cauliflower for one of my clients and when I tasted I fell in love! Soft, silky and aromatic, it was the perfect side dish.  Perfect addition for your Thanksgiving menu! Enjoy!

Puréed Cauliflower with garlic

Special Equipment – blender or food processor.  (A potato masher will work too)

1 head of Cauliflower

2 gloves of garlic

1/4 of a small onion, sliced

2 cups chicken stock

2 springs of fresh thyme

Salt and Pepper to taste

  1. Cut cauliflower into small florets. Add stock to a pot and heat to a boil. Once boiling, turn heat down to a nice simmer and add whole garlic, onion and cauliflower to the pot.  Cook for about 20 minutes until cauliflower is tender.  Strain into a bowl and add the cauliflower, garlic and onion to a blender or food processor. Add 2-3 tablespoons of the cooking liquid to the blender, the butter, and fresh thyme.  Blend until smooth.  (add more cooking liquid depending on the consistency you are looking for) Add puree to a bowl and season with salt and pepper to taste.  Serve Immediately!

Photo Nov 18, 8 38 35 PMPhoto Nov 18, 8 44 51 PM

Weeknight Peruvian Chicken

People always ask me for a quick go-to dinner for week nights, and I always give a bone in chicken meal because it’s cheaper than boneless chicken breast and WAY more flavorful, and will last longer for a lunch the next day or get another dinner out of it. This meal is one that I make for my clients a lot since it has a good shelf life in the fridge and it is bursting with flavor!  For people who usually deal with boneless chicken breast, you will see a huge difference in taste and bone in chicken is not at all hard to cook, it takes longer to cook but it is certainly worth an extra few minutes.  You want to wash your chicken pieces and pat dry, then you just rub this amazing paste inspired by Peruvian cookery, of cumin , paprika and garlic.  A paste is a dry rub with a tiny bit of liquid, in this case oil and vinegar.  Then you just pop in oven for 45 minutes and you are done, and a kitchen hero! While the chicken is cooking make a few side dishes.. Sweet potato fries, roasted parsnips, sautéed spinach, and so on.  Enjoy!

4 lbs bone in chicken thighs and legs mixed or 1 whole chicken cut up into 8-10 pieces

2 red onions or 2 sweet yellow onions, thickly sliced

2 green bell peppers, thickly chopped (square pieces)

5 cloves garlic, finely chopped

2 TBS paprika

2 TBS cumin

2 Teas. Black pepper

2 Teas. Salt (I use Kosher or Sea salt)

2 ½ TBS white or red wine vinegar

1 ½ TBS olive oil

1 lemon thinly sliced

  1. Preheat oven to  400 degrees and prepare a deep pan lined with parchment paper or foil and spray with cooking oil. Set aside
  2. In a small bowl combine the garlic, paprika, cumin, black pepper, salt, vinegar and olive oil to make a thick paste.
  3. Take 2 TBS of the paste and mix with the onions and peppers
  4. Use the remaining paste and rub into the chicken (rub ALL over don’t  miss a spot)

The chicken before putting in the oven.. I had some parsley so I sprinkled over the top

Photo Sep 13, 4 18 59 PM Photo Sep 13, 4 19 02 PM

Right out the oven!

Photo Oct 27, 7 48 15 PMPhoto Oct 27, 7 48 26 PM Photo Oct 27, 7 48 21 PM Photo Oct 27, 7 48 15 PM

Sweet Potato Egg Muffins

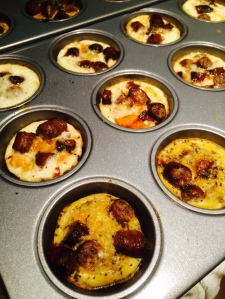
OK so my last two post have been breakfast/brunch items and this is no different BUT who cares because breakfast is amazing, anytime of the day. I have been making egg cups for one of my clients that I do weekly meals for and I try to switch it up and make them with different ingredients and different ways, sometimes I scramble the eggs then put in the muffin tins or I drop the egg right into the muffin tins, or I’ll do just egg whites and load it with cooked spinach, onions, peppers, sausage, cheese, scallions, fresh thyme and so on.  My mom called me the other day and whenever she sees something she thinks ill like on the Food Network she will call and tell me alllll about it.  She was watching Ree Drummond, from the AMAZING blog and now TV show The Pioneer Woman made hash and eggs cups in a muffin tin.  She made shredded potato hash and lined the muffin tins with hash and then the egg mixture on top and bake.  I thought it was a pretty cool idea.  It’s great to make a lot and store and have for breakfast on your way out the door for the week.  I figured I’d test it out on my client who loves eggs cups.  He prefers to eat on the healthy side so I knew fried white potatoes wouldn’t work here.  So I thought of using sweet potatoes instead and bake them instead of frying.  I also added maple brown sugar breakfast sausages and that worked so well with the sweet potatoes.  My client LOVED and requested it again the next week.  My tip, store in air tight container in the refrigerator or freezer and pop in the microwave in the morning and start your day on a good foot and happy stomach!

Sweet Potato Egg Muffins

Special Equipment: 2 non stick muffin tins, baking sheet

1 dozen eggs

4-5 sweet potatoes

1 lb breakfast sausage (I used a maple brown sugar flavor)

2 TBS onion powder

1 TBS garlic powder

1 Teaspoon paprika

2 TBS olive oil

Salt and Pepper to taste

Cooking / baking spray

  1. Preheat oven to 400 degrees.
  2. Peel and cut potatoes into 1 inch cubes. Place in a bowl and sprinkle with 1 TBS onion powder, garlic powder, paprika and salt and pepper. Add olive oil and toss together. Line the baking sheet with foil or parchment and lightly spray, then spread out the sweet potatoes and bake for 30 minutes.
  3. While potatoes are in the oven, cook the sausages, either in a pan or bake in oven. Whisk the eggs with a whisk or fork and season with the remaining onion powder, salt and pepper.
  4. Cut sausages into pieces and set aside. When the potatoes are done, turn the oven done to 350 degrees. Spray each cup of the muffin tins (you can be generous here).  First divide the sweet potatoes among the cups, mine came to about 5-6 pieces each.  Take the back of a spoon or your fingers (best tool in the kitchen) and mash the potatoes into the bottom of the tins.  Then add the pieces of sausage on top of the potatoes.  Then pour the egg mixture into each cup (be careful not to overfill).
  5. Bake for about 15 minutes. Cool on a baking wrack and then store in an air tight container. ENJOY!

Photo Oct 19, 7 07 07 PM Photo Oct 19, 7 04 23 PMPhoto Oct 19, 7 11 24 PMPhoto Oct 19, 7 11 51 PM

If you make this, (and you should) take a picture and hash tag on facebook or instagram #PersonalDish 🙂

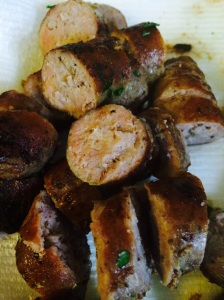
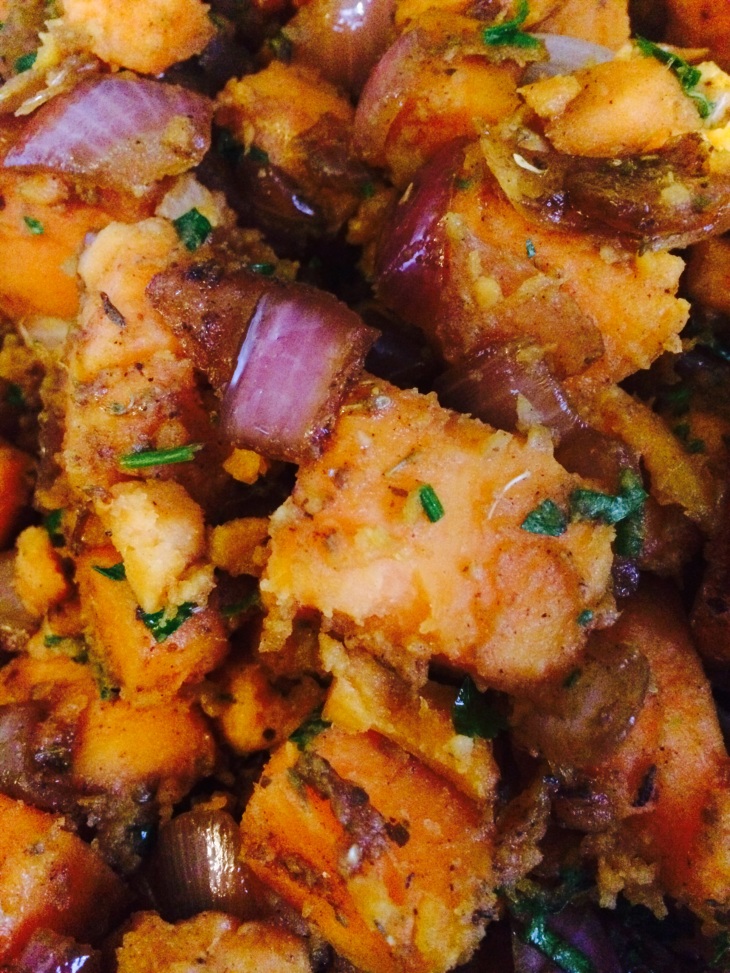
Sweet Potato Hash with Sausage

hmmmm.. doesn’t it just SOUND amazing??  Caramelized onion, fresh thyme, juicy sausage and incredible sweet potatoes come together in a perfect marriage for this amazing anytime of the day meal.  In the morning, you can throw a fried or over easy egg on top for a quick breakfast, for lunch it becomes the main attraction and so perfect heated up on its own, and for dinner it makes an excellent side dish to chicken, beef,  fish, tofu, hearty salad… ummm you get the point!  This is great meal to make in bulk, and ahead of time as it keeps well in the fridge for up to a week or in the freezer for up to a month (but it won’t last that long..trust!) This whole meal comes together rather quickly, and not to many ingredients, if you’re a vegetarian substitute the sausage for tofu, simply cook up the tofu before adding to the sweet potatoes and onion mixture. So go ahead, get in your kitchen is and make this..now!! Enjoy folks 🙂

Sweet Potato Hash with Sausage

Ingredients

1 lb Italian style sausage

4-5 Sweet potatoes

1 yellow onion, chopped

Fresh Thyme

1 TBS paprika

2 TBS oregano

Salt and Pepper to taste

1. Peel and cut potatoes into bite size cubes (don’t need to be perfect but you want the same size pieces so it cooks evenly) Put in a pot and cover with cold water, then bring to a boil and let simmer for 10-15 minutes.  You want it to be soft and tender but not in a “mashable” state.  Test with a fork and taste, you want a little bite, not completely soft.

Photo Sep 06, 5 26 55 PM

2. While the potatoes are cooking, heat a pan on medium heat and cook the sausages fully.  Once they are done cut into pieces (about 1 inch)

Photo Sep 06, 5 27 11 PM

3. In the same pan you cooked the sausages, add the onions and thyme to pan and cook until onions are soft and slightly caramelized.  Drain the potatoes and add to the pan with the onions, cook for about 4-5 minutes, season with salt, pepper, paprika and oregano.  Add the sausage, mix all together and serve, or store in air tight container in the fridge for up to a week or longer in the freezer.


Photo Sep 06, 5 26 42 PM

Sunday Brunch: Sausage, Spinach, Sundried Tomatos and Cheddar Cheese Frittata

The title says Sunday brunch but really you can have this for dinner any night of the week. I recently made this frittata for a client that I cook for on a weekly basis. Its filling, delicious and easy! One of the first things I made back in culinary school was a onion frittata and I was so nervous it wouldn’t flip out of the pan correctly, the anxiety was on HIGH that class haha! But it came out great and that’s because I had an excellent non stick pan. That is the key here, and once you have that the rest is piece of cake. Frittata by the way is a big omelet started in a non stick heavy duty pan and finished in the oven to blow up and be nice and puffy. Similar to a quiche but with no crust. You can add any kind of toppings your little heart desires, so its great when you want to get rid of herbs and vegetables in your fridge! For this one I used sweet Italian sausage, spinach, sundried tomatoes and cheddar cheese. The process is always the same, you want to cook your filling in the same pan you cook the frittata in then add your egg mixture, cook in pan and then finish it off in the oven. Then you invert on to a plate. Try this combo or one of your own for you next brunch party or week night dinner!


Photo May 10, 4 17 08 PM


Sausage, Spinach, Sundried Tomatoes and Cheddar Cheese Frittata

Preheat oven to 350. Use a non stick, oven safe frying pan.
10 Eggs
2 lbs spinach, chopped
1 small onion, chopped
1 lb Sweet Italian Sausage
8 ounces of sundried tomatoes
8 ounces of cheddar cheese, shredded
Butter or oil

1. Crack eggs in a bowl and whisk until frothy and well combined. Add salt and pepper to taste and set aside in the fridge
2. Cook the sausages on medium heat all the way through, cool on a plate then cut in small pieces
3. Next heat a heavy duty non stick pan on medium heat, drizzle oil or a few teaspoons of butter around the pan. Add spinach to pan and cook down and season with a little kosher salt, next add onions and cook until translucent. Add in the cooked sausage and tomatoes. Mix all together and cook for another minute or two.
4. Add egg mixture to the pan and let sit for 1 minute. Using a rubber spatula go around the edges of the pan once, then go from one edge to the middle of the pan, letting the middle liquid go to the edge. This will ensure the middle is cooking and as well as the edges. When you see sold pieces of egg forming, turn off heat, add shredded cheese on top and transfer to the oven for 15-20 minutes. The egg mixture will rise and the edges will be a dark brown. You can use toothpicks to see if the middle is well cooked.

5. Let cool in pan completely.  Then take a plate or cutting board and put over the pan and flip over.  Frittata should come out easily.  Then flip over again on to a plate.  Cut in triangle pieces  and serve with a simple salad.


Photo May 10, 4 16 23 PM                                                            Photo May 10, 4 44 32 PM


Spicy Cucumber Salad

I made this simple cucumber salad at my Memorial Day BBQ and it was a big hit (except for my best friend Tracey, who is super pickyyyy.. who doesn’t like cucumbers??) Cucumbers have great nutritional value, low in calories and helps reduce bloating, so it’s perfect after a day (or weekend) of over eating. This salad has a nice spicy kick to it and the longer it sits in the fridge the better! I would make it the night before need it and enjoy the next day!

Spicy Cucumber Salad

4 Cucumbers (leave skin on and cut as thinly as you can, if you prefer use a mandolin)
2 garlic cloves, chopped fine
2 jalapeños, seeded and chopped fine
4 limes
1/4 of extra virgin olive oil
1 TBS red hot chili flakes
Kosher Salt to taste

1. Place the cucumbers in a large bowl. Add the chopped garlic and chopped jalapenos. (NOTE: use gloves to cut open the peppers and scrape all the seeds out so the salad it is not TOO spicy!)
2. In another bowl cut the limes and squeeze out as much juice as you can. Add the chili flakes, salt and oil. Whisk with a fork until combined.
3. Add dressing to the cucumbers and toss everything together. Place in the fridge for 2 hours or overnight.

Photo May 24, 5 17 29 PM

Dark Chocolate Spelt Brownies

The more and more I eat dark chocolate the more I prefer it over milk chocolate, which was not the case even a year ago. I tend to use good quality semi-sweet or bittersweet in my baking now, and the results are a sophisticated not overly sweet taste that is so satisfying. I love making homemade (not in a box) brownies, it’s so easy and again its nice to know exactly everything in your baking. I make these brownies with spelt flour, which is an ancient healthy whole grain in the wheat family. It’s like a distant cousin to our modern day whole wheat. It’s not gluten free but its a great alternative to wheat and can be used in place of it with a 1 to 1 ratio. I love it, it looks like wheat flour, it has a nice nutty flavor but it doesn’t overpower in recipes like whole wheat flour can tend to do. It’s not to hard to find, if your local grocery store has a natural foods section you can find it there or if you are near an Ocean Job Lot they carry the Bob’s Red Mill brand which is what I use. Make this brownie the next time you have a chocolate craving (that’s why I did it) they are so incredibly moist and decadent.

Dark Chocolate Spelt Brownies (adapted from Spelt Brownies)

1 stick of unsalted butter (1/2 cup)
8 ounces of semi sweet or bittersweet chocolate chips (I use Ghirardelli)
1/2 cup brown sugar
1/2 cup granulated sugar
3 Large eggs (room temperature)
1/4 cup of cocoa powder
3/4 of Spelt flour OR you can split this and do 1/4 AP flour and 2 quarters spelt flour
1/2 teaspoon of salt

1. Preheat oven to 350 degrees. Spray or butter a 8 inch square baking pan and line with parchment paper. I use coconut spray from Trader Joes
2. Place butter and chocolate in a bowl set over a pot of simmering water. Let that melt together. Take off heat and then add the sugars. Whist in the sugars until well combined
3. Let that cool a bit before adding eggs in one at a time. the add the cocoa powder and the salt. Fold in the flour until everything is incorporated. Don’t over mix!
4. Place batter in prepared pan and baked 25-30 minutes. Make sure to cool completely before cutting into it. Cut into squares and enjoy immediately!!

Photo May 08, 7 12 23 PM (1)

Photo May 08, 7 12 17 PM

Photo May 08, 7 15 58 PM

Quick Lunch Salad– Kale, Grilled chicken, and Roasted chickpeas

I came up with this salad the other day while I was in a panic in the morning realizing that I forgot to prepare a lunch for the day. I have been trying hard not to buy lunch and thought I would have to that day. But I had a few things in my fridge and had a “make it work” moment and it turned out to be great! The night before I had grilled up chicken breast to have for a salad or to add to a quick pasta dish. I had a kale which I love for salad because it hold up to salad dressing well without wilting and is packed with nutrients and flavor. I had roasted chickpeas the day before(which is my new thing..love it) and a good chunk of blue cheese I had bought the other day. So I thought if I just pack all this up I can assemble a pretty good salad for lunch. All it takes is a little preparation the night before and you have nice gourmet salad and be the envy of all your coworkers who are drooling over your lunch! Pack the chicken in one container, and the vegetables in another. I always make my own dressings so I know what exactly is in them and they often taste better then store bought, but this is your lunch so do whatever makes your stomach happy!

Grilled Chicken Kale Salad
1-2 cups kale, cut up in bit size pieces, hard stem removed
2 pieces of chicken breast, cooked and cut into thin slices
Few pieces of thinly sliced red pepper and onion
2 TBS of roasted chickpeas
Few crumbles of Blue cheese

Assemble a bed of kale on a plate making a slight dome shape. Add the grilled chicken around the dome, then the peppers, onions and chickpeas around and on top of the salad. Add the cheese last and drizzle with your favorite dressing or the yogurt dressing below!

Creamy Yogurt Dressing
1 cup Greek plain yogurt
juice from 1 lemon
fresh thyme, sage or Italian season blend
3 TBS red wine vinegar
Salt and pepper to taste

Add everything to a small bowl and whisk with a fork or small whisk, add salt and pepper to taste.

Photo May 07, 1 17 58 PM (1)

Photo May 07, 1 17 58 PM