Puréed Cauliflower

Cauliflower is the new kale.  You type cauliflower into a Pinterest search and you get anything from buffalo cauliflower bites to cauliflower pizza crust.  I’m glad because I feel like I have ignored it for years.   For one, it smells when it’s raw and I thought it was just boring.  I have tried the pizza crust (and have perfected it!) and the Asian flavored bites are a great appetizer.  I made this Puréed  cauliflower for one of my clients and when I tasted I fell in love! Soft, silky and aromatic, it was the perfect side dish.  Perfect addition for your Thanksgiving menu! Enjoy!

Puréed Cauliflower with garlic

Special Equipment – blender or food processor.  (A potato masher will work too)

1 head of Cauliflower

2 gloves of garlic

1/4 of a small onion, sliced

2 cups chicken stock

2 springs of fresh thyme

Salt and Pepper to taste

  1. Cut cauliflower into small florets. Add stock to a pot and heat to a boil. Once boiling, turn heat down to a nice simmer and add whole garlic, onion and cauliflower to the pot.  Cook for about 20 minutes until cauliflower is tender.  Strain into a bowl and add the cauliflower, garlic and onion to a blender or food processor. Add 2-3 tablespoons of the cooking liquid to the blender, the butter, and fresh thyme.  Blend until smooth.  (add more cooking liquid depending on the consistency you are looking for) Add puree to a bowl and season with salt and pepper to taste.  Serve Immediately!

Photo Nov 18, 8 38 35 PMPhoto Nov 18, 8 44 51 PM

Weeknight Peruvian Chicken

People always ask me for a quick go-to dinner for week nights, and I always give a bone in chicken meal because it’s cheaper than boneless chicken breast and WAY more flavorful, and will last longer for a lunch the next day or get another dinner out of it. This meal is one that I make for my clients a lot since it has a good shelf life in the fridge and it is bursting with flavor!  For people who usually deal with boneless chicken breast, you will see a huge difference in taste and bone in chicken is not at all hard to cook, it takes longer to cook but it is certainly worth an extra few minutes.  You want to wash your chicken pieces and pat dry, then you just rub this amazing paste inspired by Peruvian cookery, of cumin , paprika and garlic.  A paste is a dry rub with a tiny bit of liquid, in this case oil and vinegar.  Then you just pop in oven for 45 minutes and you are done, and a kitchen hero! While the chicken is cooking make a few side dishes.. Sweet potato fries, roasted parsnips, sautéed spinach, and so on.  Enjoy!

4 lbs bone in chicken thighs and legs mixed or 1 whole chicken cut up into 8-10 pieces

2 red onions or 2 sweet yellow onions, thickly sliced

2 green bell peppers, thickly chopped (square pieces)

5 cloves garlic, finely chopped

2 TBS paprika

2 TBS cumin

2 Teas. Black pepper

2 Teas. Salt (I use Kosher or Sea salt)

2 ½ TBS white or red wine vinegar

1 ½ TBS olive oil

1 lemon thinly sliced

  1. Preheat oven to  400 degrees and prepare a deep pan lined with parchment paper or foil and spray with cooking oil. Set aside
  2. In a small bowl combine the garlic, paprika, cumin, black pepper, salt, vinegar and olive oil to make a thick paste.
  3. Take 2 TBS of the paste and mix with the onions and peppers
  4. Use the remaining paste and rub into the chicken (rub ALL over don’t  miss a spot)

The chicken before putting in the oven.. I had some parsley so I sprinkled over the top

Photo Sep 13, 4 18 59 PM Photo Sep 13, 4 19 02 PM

Right out the oven!

Photo Oct 27, 7 48 15 PMPhoto Oct 27, 7 48 26 PM Photo Oct 27, 7 48 21 PM Photo Oct 27, 7 48 15 PM

Sweet Potato Hash with Sausage

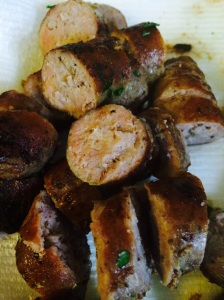
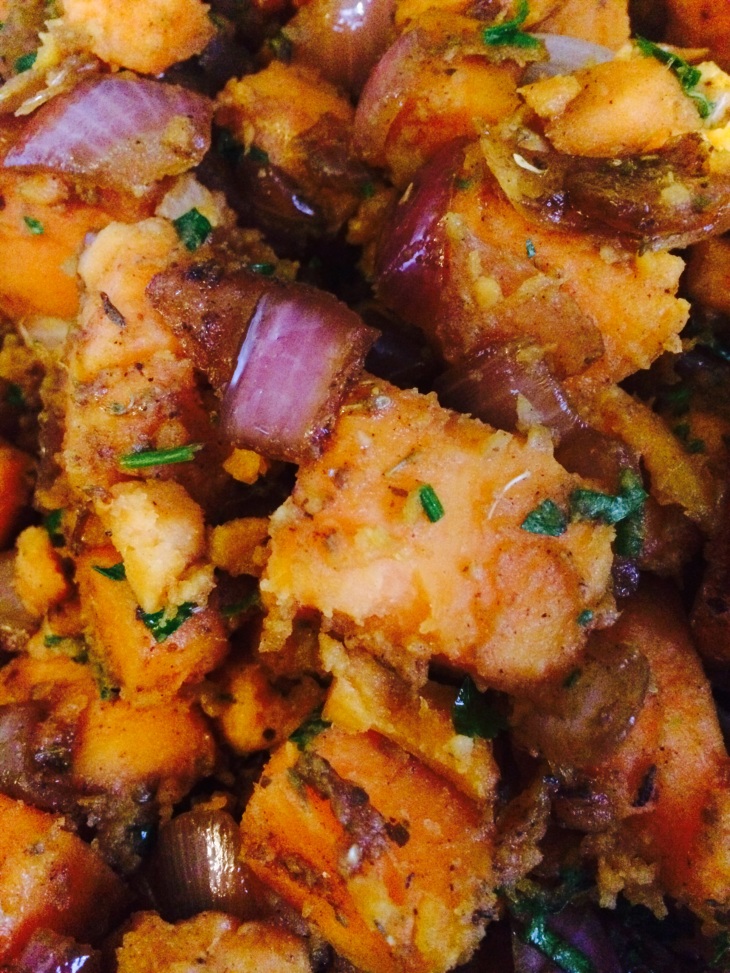
hmmmm.. doesn’t it just SOUND amazing??  Caramelized onion, fresh thyme, juicy sausage and incredible sweet potatoes come together in a perfect marriage for this amazing anytime of the day meal.  In the morning, you can throw a fried or over easy egg on top for a quick breakfast, for lunch it becomes the main attraction and so perfect heated up on its own, and for dinner it makes an excellent side dish to chicken, beef,  fish, tofu, hearty salad… ummm you get the point!  This is great meal to make in bulk, and ahead of time as it keeps well in the fridge for up to a week or in the freezer for up to a month (but it won’t last that long..trust!) This whole meal comes together rather quickly, and not to many ingredients, if you’re a vegetarian substitute the sausage for tofu, simply cook up the tofu before adding to the sweet potatoes and onion mixture. So go ahead, get in your kitchen is and make this..now!! Enjoy folks 🙂

Sweet Potato Hash with Sausage

Ingredients

1 lb Italian style sausage

4-5 Sweet potatoes

1 yellow onion, chopped

Fresh Thyme

1 TBS paprika

2 TBS oregano

Salt and Pepper to taste

1. Peel and cut potatoes into bite size cubes (don’t need to be perfect but you want the same size pieces so it cooks evenly) Put in a pot and cover with cold water, then bring to a boil and let simmer for 10-15 minutes.  You want it to be soft and tender but not in a “mashable” state.  Test with a fork and taste, you want a little bite, not completely soft.

Photo Sep 06, 5 26 55 PM

2. While the potatoes are cooking, heat a pan on medium heat and cook the sausages fully.  Once they are done cut into pieces (about 1 inch)

Photo Sep 06, 5 27 11 PM

3. In the same pan you cooked the sausages, add the onions and thyme to pan and cook until onions are soft and slightly caramelized.  Drain the potatoes and add to the pan with the onions, cook for about 4-5 minutes, season with salt, pepper, paprika and oregano.  Add the sausage, mix all together and serve, or store in air tight container in the fridge for up to a week or longer in the freezer.


Photo Sep 06, 5 26 42 PM

Quick Lunch Salad– Kale, Grilled chicken, and Roasted chickpeas

I came up with this salad the other day while I was in a panic in the morning realizing that I forgot to prepare a lunch for the day. I have been trying hard not to buy lunch and thought I would have to that day. But I had a few things in my fridge and had a “make it work” moment and it turned out to be great! The night before I had grilled up chicken breast to have for a salad or to add to a quick pasta dish. I had a kale which I love for salad because it hold up to salad dressing well without wilting and is packed with nutrients and flavor. I had roasted chickpeas the day before(which is my new thing..love it) and a good chunk of blue cheese I had bought the other day. So I thought if I just pack all this up I can assemble a pretty good salad for lunch. All it takes is a little preparation the night before and you have nice gourmet salad and be the envy of all your coworkers who are drooling over your lunch! Pack the chicken in one container, and the vegetables in another. I always make my own dressings so I know what exactly is in them and they often taste better then store bought, but this is your lunch so do whatever makes your stomach happy!

Grilled Chicken Kale Salad
1-2 cups kale, cut up in bit size pieces, hard stem removed
2 pieces of chicken breast, cooked and cut into thin slices
Few pieces of thinly sliced red pepper and onion
2 TBS of roasted chickpeas
Few crumbles of Blue cheese

Assemble a bed of kale on a plate making a slight dome shape. Add the grilled chicken around the dome, then the peppers, onions and chickpeas around and on top of the salad. Add the cheese last and drizzle with your favorite dressing or the yogurt dressing below!

Creamy Yogurt Dressing
1 cup Greek plain yogurt
juice from 1 lemon
fresh thyme, sage or Italian season blend
3 TBS red wine vinegar
Salt and pepper to taste

Add everything to a small bowl and whisk with a fork or small whisk, add salt and pepper to taste.

Photo May 07, 1 17 58 PM (1)

Photo May 07, 1 17 58 PM

Peanut Butter Flaxseed Granola Bars

I love granola bars, it’s quick on-the-go breakfast or snack during the day. The problem is that they are super expensive (im cheap, thanks mom) and who knows what “preservatives” companies are putting in these things, and lets not even get into the amounts of sugar in these bars. So I decided to make my own, which turned out to be incredibly simple and completely addictive! I used my favorite ingredients; oatmeal, peanut butter, chocolate chips, dried cherries, flaxseeds, coconut oil, honey, nutmeg and cinnamon. You can of course put in what YOU love and mix it up each time.

Photo Apr 30, 9 25 13 AM

Photo Apr 30, 9 25 13 AM (1)

Peanut Butter Flaxseed Granola Bars

3 cups oatmeal
1/2 cup peanut butter
1/3 cup chocolate chips
1/3 cup crushed and whole almonds or cashews
1/4 cup dried fruit or raisins (I used dried cherries)
1/4 honey or maple syrup
2 tbs flaxseeds
2 tbs coconut oil
Few dashes of cinnamon and nutmeg

Prepare a 8×8 baking dish line with parchment paper and sprayed with baking spray. Have the parchment hanging over the sides so its easy to pull out in the end.

1. In a sauce pan add the peanut butter and honey and heat for 2-3 minutes and shut off
2. In a bowl combine the remaining ingredients and add a sprinkle of kosher salt
3. Add the peanut butter mixture and combine everything well
4. Add mixture to the prepared pan and push down tightly with your fist. Cover with plastic wrap and keep in the fridge to set for 2 hours
5. When it’s set, take out of pan and cut in squares or rectangular bars Enjoy!!

Photo Apr 30, 9 21 23 AM

Coconut Crunch Cake

There is a line in a Beyoncé song where she says/sings with power and major badassness “Bow Down Bitches”,  and its amazing,  I don’t have time to explain that this is a song about empowerment and confidence in woman who hold power in this male dominated world, so I won’t.  I know you must be asking what does this song have to do with one of the most delicious cakes I have ever made?? Well the answer is Martha “bow down bitches” Steward.  When is comes to food, especially baking I have so much respect for this icon.  She is fierce and so is the coconut cake she recently had in the latest issue of her magazine Living.  Now, I’m not a huge fan of coconut, I like the oil and milk for certain things in cooking but that’s really where it ends for me with coconut.  I wish I liked it more since the health benefits are through the roof with good stuff for your body.  But this cake looked so friggin good that I NEEDED to try it, and good thing I did because this cake is so good, so delicate and so perfect.  Its like a coconut macaroon and a cake all in one.  There are 3 separate elements; the cake, the shredded coconut topping and  (my favorite) chocolate ganache.  This can also make a great coconut cupcake!  Ill be making this again and again!! As always, enjoy!

Coconut Crunch Cake Cake

1/2 cup unsalted butter, room temperature

1 1/2 all purpose flour

1/2 teaspoon baking powder

1/4 teaspoon baking soda

3/4 teaspoon  kosher salt

1/2 cup of cream of coconut ( I used Trader Joe’s brand extra think coconut milk)

1 teaspoon of pure vanilla

1/4 cup coconut oil

1 cup sugar

3 room temperature eggs

Topping

2 egg whites

1/8 teaspoon salt (a pinch)

1 14 ounce can of sweetened condensed milk

2 teaspoons vanilla

3 cups shredded coconut

Chocolate Ganache

1 cup semi sweet chocolate 1/2 cup heavy cream


1. Preheat oven to 350 and prepare a springform cake pan by rubbing butter all over the pan or spray with baking spray.  Dust with a little bit of flour.  In a bowl mix the dry ingredients together (flour, baking soda/powder and salt).  In another bowl mix the cream of coconut  and vanilla together.

2. In a standing mixer beat the butter and coconut oil together.  Slowly add sugar.  Beat until pale and fully, about 3-5 minutes (this is important!!)  Reduce speed and add eggs one at a time.  Then on low add the flour mixture in 3 additions alternating with the cream of coconut/vanilla.  Mix until just combined.

3. Spread the cake batter into the cake pan.  Now make your topping: Add egg whites to the mixer and attached the whip attachment.  Whip until frothy.  Mix in the sweetened condensed milk and vanilla.  Then fold in the coconut.

4. Dollop topping on the cake batter, carefully spread the topping evenly.  Put cake in oven and bake for 1 hour.  Test with a tookpick to  make sure cake is baked all the way through.

5. Make chocolate sauce: Heat heavy cream in a saucepan and heat until its starts to simmer and turn off.  Pour hot cream over chocolate chips and let sit for a few minutes, then mix with a  spoon.   When cake is done and cooled drizzle chocolate sauce over cake.  When you cut the cake use the extra sauce for individual slices!


Photo Apr 07, 12 07 02 AM Photo Apr 07, 12 25 41 AMPhoto Apr 07, 12 27 14 AM (1)

Butternut Squash and Black Bean Soup

I have been meaning to make butternut squash for the longest time, and just haven’t got around to making it.  It’s a great weeknight soup because you can make it super fast (30 minutes or less!) and makes great leftovers for lunch the next day.   I tend to go to the grocery store and buy things that I can freeze and make when I feel like it, one of those things is butternut squash.  I bought it a few months ago, cut it up and put in a plastic bag and kept it in my freezer.   I keep this soup super simple with just 3 ingredients; onions, garlic and squash.  I use my immersion blender to make  smooth creamy soups.  I had black beans and corn left over from my stuffed sweet potatoes , so I thought why not use them up and make a great addition to this soup.  The results were just what I wanted, the black beans added  the creaminess, and the corn (which I did not purée) gave the soup a nice texture against the smooth soup.  I cut up scallions and grated fresh parmigiano reggiano on top. Really. Really. Good

Butternut Squash and Black Bean Soup

Special Equipment- food processor or immersion blender (if you don’t have either of these this is a great chunky soup as well!)

1 lb of butternut squash cut into 1 inch pieces

3 cups vegetable, chicken or (like I used) homemade stock

2 cups black beans

1 cup of frozen corn

1 small onion chopped

2 cloves garlic cloves chopped

chopped scallion, grated or shaved parmigiano salt and pepper to taste

1. Put a large soup pot on medium heat with 2 tbs of olive or coconut oil

2. Saute onions and garlic for 3 minutes until the onions are beginning to soften

3. Add the butternut squash and let cook for another 5 minutes.  Add salt and pepper

4. Add the stock, corn and beans.  Let simmer for 10 minutes

5. Let cool.  Then blend in batches until creamy (if using food processor) or right in the pot (if using immersion blender)

6. Adjust seasonings (add a few drops of hot sauce if you wish!..I did)  Add scallions and cheese.  EAT!

Photo Feb 24, 8 17 25 PM (1)  Photo Feb 24, 8 27 12 PM Photo Feb 24, 8 27 23 PM (1)

Stuffed Sweet Potatoes

I LOVE sweet potatoes, in any form, mashed, cut up in little pieces for a breakfast hash, candied for  Thanksgiving, in a pie, fries, but my hands down favorite is roasted. There is truly nothing better than sweet potatoes put in an high oven and roasted to perfection. You can add a little butter and cinnamon but I like it just the way it is, it’s sweet enough that it doesn’t require much of anything.  In restaurants I have seen where they like to “kick up” a baked sweet potato with junk like marshmallows, and not that there is anything wrong with marshmallows but sweet on top of more sweet is just gross and a good way to ruin a perfectly good vegetable.  Not to mention the spike in calories.  Sweet potatoes already have a great amount of nutrients, why not compliment it with even MORE healthy goodness?  I got this great idea from a post on Pintrest. You split open a perfectly baked sweet potato and stuff it with this lime cilantro infused black bean and corn mixture.  The idea is genius, delicious AND couldn’t be easier!   This is a great side dish or main dish.  Try it tonight..seriously DO IT!

Stuffed Sweet Potatoes

Preheat oven to 400 degrees

4 Sweet potatoes

1 can of black beans, drained

1 can of corn or frozen corn, cooked

1 orange or yellow (or red or green) bell pepper, chopped

1 small or 1/2 of a big red onion, chopped

3-4 limes, juiced

1/4 cup of cilantro

2 tbs honey

a few dashes of hot sauce

3 TBS of olive oil

Course salt and pepper to taste

1. Line a baking sheet with foil or parchment paper.  Put potatoes on sheet and roast in oven for 30-40 minutes

2. Meanwhile make your stuffing.  In a bowl mix the onion, pepper, corn,  and beans.  In  separate bowl whisk together the lime juice, honey, hot sauce, oil and salt and pepper.  Add dressing to the bean mixture.  Keep refrigerated until potatoes are done.

3.   Take potatoes out when they are soft and tender throughout.  (you can prick with a fork to test)

4. Using a pairing knife split open lengthwise and cut 3 quarters of the way down.  Making enough room for the stuffing.  Add  spoonful’s of the bean mixture to each potato.  You can add more lime juice to the top or more hot sauce (ME) or even a little feta cheese if you have it!   Its so incredibly refreshing and so good! Enjoy!! (Tip- make extra stuffing and add it to fish, chicken or beef for a great topping!)

Photo Feb 16, 3 50 41 PM (1)Photo Feb 16, 3 50 39 PM

Photo Feb 16, 3 50 41 PM

Recipe adapted from: HERE

Dark Chocolate Chip Cookies (cleanse friendly)

Hello Everyone! It is day 19 of  cleansing, I’ll be done this Wednesday!  I feel great and have learned some really great new recipes using different grains, new vinaigrettes, new salads, soups, protein boosters and I can say I’m a new tofu fan!  I will definitely be using a lot of these new techniques well past the cleanse and try to keep it as healthy as I can throughout the year, and of course some indulgences along the way!  This past weekend I was craving buttery, sweet homemade chocolate chip cookies.  I knew if I could make the cleanse friendly pancakes then there was a way to make cookies.  So no eggs, flour, butter or refined white sugar– all the great things in a normal cookie needed to be removed but still taste great, was going to be another challenge.  I found a pretty good recipe using coconut oil, which I took as the butter substitute.  I didn’t have coconut oil but  I did have almond butter and thought this might be a good alternative and it worked out great! I used almond meal, oat flour , vegetable oil, pure maple syrup, flax seeds and dark chocolate chips.  I like the combo of oat flour and almond meal but you could easily just use almond meal and no oat flour.  These tasted so good! I only waited a minute or two for them to cool because I love the fresh out of the oven taste with the dark chips melting in my mouth!  I dipped mine in almond milk.  It’s the perfect guilt free dessert! Enjoy

Dark Chocolate Chip Cookies (cleanse friendly)

1 1/2 cups Almond Meal

1/2 cup Oat Flour  (alternatively you can skip the oat flour and do 2 cups of Almond meal)

1/2 teaspoon Baking Soda

1/4 teaspoon salt

1/4 cup coconut oil or vegetable oil

3 tablespoons almond butter

3 tablespoons pure maple syrup

2 teaspoons vanilla

2 tablespoons of flaxseed

1/2 cup of dark chocolate chips

1. Whisk the dry ingredients in a bowl (flours, salt, baking soda)

2. Then using a wooden spoon stir in the oil, syrup, almond butter, flaxseed and vanilla. Fold in chocolate chips.

3. Using a small scooper drop rounds of dough onto a Silpat or parchment lined baking sheet. Flattened dough with a fork or spoon.

4.  Bake in a 350 degree oven for 8 to 10 minutes.  Enjoy with Almond or soy milk!

Photo Jan 17, 8 18 57 PM
Photo Jan 17, 8 18 52 PM
Photo Jan 17, 9 50 00 PM

Adapted from this site: Vegan Cookies

Egg Free, Wheat free and Dairy free Pancakes

I love pancakes, like really love pancakes. While on my cleanse I didn’t think it was possible to have pancakes. I figured even if I got whole grain or wheat free flours, how was it possible without an egg to make it nice and fluffy. And I wanted it to still taste like a good ol’ pancake should. I did some research on pintrest, and of course there are boards of egg free pancakes. Most of the recipes I found had oil and butter. Oil I can use, butter I could not. Then I remembered these chocolate muffins I made from the book Naturally Thin from Bethenny Frankel, she used applesauce in place of eggs in this recipe. The recipe was great and worked perfectly. (recipe here:http://www.bethenny.com/2011/03/08/low-fat-fudge-chocolate-chip-muffins/) So I figured the oil and applesauce could work here in place of an egg. I love cornmeal in my pancakes so I know I wanted that, I had oat flour and on my recent trip to Trader Joe’s I purchased almond meal. Almond meal is ground whole almonds and it works great in cakes and other baking applications. The 3 flours, cinnamon, vanilla and applesauce made a really amazing pancake. And a very guilt free pancake! When on a cleanse its not about being starving and taking away all the things you love to eat, it takes a little work but you can still enjoy some of your favorites. Try this great and easy recipe!

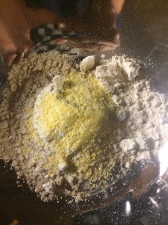
First combine the 3 flours, raw sugar, cinnamon, baking soda and pinch of salt
Photo Jan 11, 12 41 26 PM

Use unsweetened natural applesauce
Photo Jan 11, 12 56 22 PM

Mix the wet ingredients into the dry. I used almond milk, but you could use any other nut milk or soy milk.

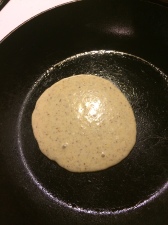
Heat on medium and spray with cooking oil. I found coconut spray at Trader Joes!
Photo Jan 11, 1 04 43 PM

Photo Jan 11, 1 08 47 PM

Photo Jan 11, 1 21 19 PM

Once it bubbles, flip and start to stack. These are going to be a little darker because of the flours. I drizzled mine with a tablespoon of pure maple syrup I got at a local farmers market.
Photo Jan 11, 1 40 34 PM

Egg free, Wheat free and Dairy Free Pancakes

1/2 c oat flour
1/2 c almond meal
1/4 cup of cornmeal
2 teaspoons baking powder
2 tablespoons raw sugar
1 teas. cinnamon
2 TBS unsweetened apple sauce
1 c almond milk
1 teas. vanilla
1 TBS vegetable or olive oil

1. Combine oat, almond and cornmeal in a bowl. Add baking powder, cinnamon sugar and a pinch of salt.
2. Whisk in milk, vanilla, oil, and applesauce. Mix well
3. Transfer the pancake mix to a measuring cup for easy pouring into the pan, alternatively you could us a 1/4 measuring cup to keep your pancakes the same size.
4. Heat skillet to medium heat. Pour batter into pan and cook until tiny bubbles start to form. Flip with a spatula and cook for another 2-3 minutes. Repeat. Enjoy with fruit and a little sprinkle of powdered sugar or a tablespoon of pure maple syrup!